You are currently viewing How to Connect Printer to a Wi-Fi Network – Window 11 (+1 214 513 3852)

How to Connect Printer to a Wi-Fi Network – Window 11 (+1 214 513 3852)

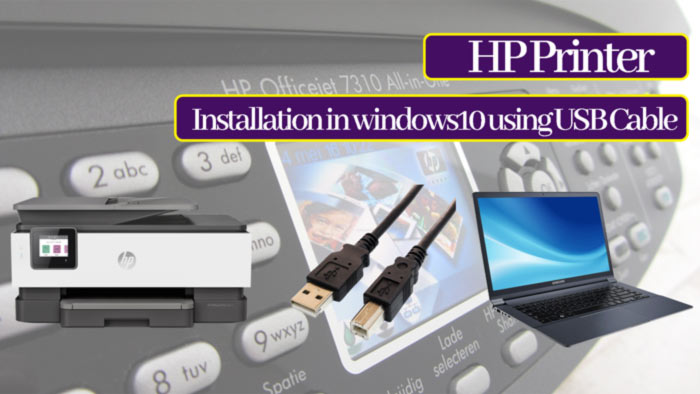
Windows 11 will still try to automatically detect and install any local printers (such as those using USB). However, if the system fails to configure it, you are dealing with an old printer, or you want to connect a wireless printer, you will have to add it manually.

Whether you need to install a brand new all-in-one printer or an older dot-matrix, inkjet, or laser printer from manufacturers like HP, Canon, Epson, and Brother, Windows 11 offers several ways to configure the device.

In this Windows 11 guide, we’ll walk you through the different ways to add a wired or wireless printer to your laptop or desktop.

How to Set Up a USB or Wi-Fi Printer in Windows 11

To set up a printer in Windows 11, follow these steps:

1.       Open Settings.

2.      Click Bluetooth & Devices.

3.      Click the Printers and scanners setting.

4.      Next, click the Add Device (Refresh) button.

5.      Click the Add Device button for the wireless or locally attached printer.

add printer in windows 11

Once you complete the steps, the system will detect and install the basic driver for that specific printer.

How to manually configure a printer in Windows 11

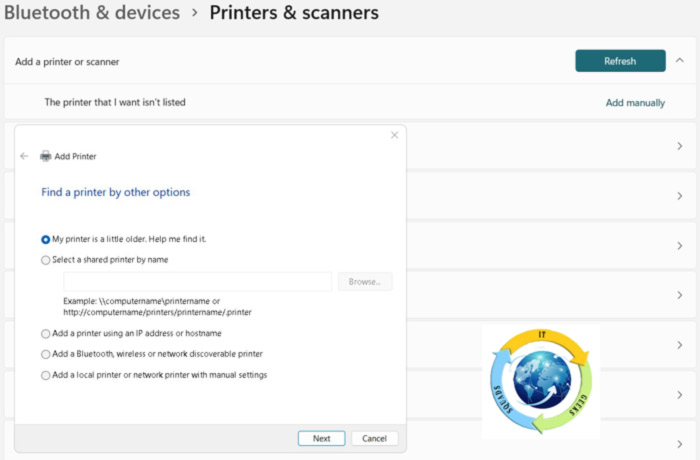
If the system cannot install the printer automatically because it is an old printer or there is a compatibility problem, you can install the device in at least three ways: you can use the old wizard to install the printer manually, configure a TCP/IP connection if this is a network printer or use the option to add a local printer by selecting the port manually.

Install the printer manually


To install a printer using the old wizard in Windows 11, follow these steps:

Open Settings.

Click Bluetooth & Devices.

Click the Printers and scanners setting.

Next, click on the Add Device button.

Click on the Add manually option (Quick note: this option may take some time to appear while the system searches for printers locally and on the network).

Select the My printer is a bit older option.

Select the printer from the list.

Click the Next button.

Click the Windows Update button (if available).

Select the printer brand on the left side.

Select the printer model on the right side.

Click the Next button.

(Optional) Confirm a name for the printer.

Click the Next button.

Select the Do not share this printer option.

Click the Next button.

Click the Print Test Page button to confirm that the device is working.

Finally, click the Finish button.

After completing the steps, if the test page prints, you will know that the printer has been successfully installed on Windows 11.

How to manually configure a printer in Windows 11

To install a network printer, follow these steps:

Open Settings.

Click Bluetooth & Devices.

Click the Printers and scanners setting.

Next, click on the Add Device button.

Click on the Add manually option.

Select the Add a printer using a TCP/IP address or host name option.

Click the Next button.

Select the TCP/IP Device option using the “Device Type” drop-down menu.

(Optional) Confirm a name for the printer.

Click the Next button.

Select the Do not share this printer option.

Click the Next button.

Click the Print Test Page button to confirm that the device is working.

Finally, click the Finish button.

After completing the steps, the network printer will install on the computer.

Install local printer

To install a printer using a parallel or serial cable, follow these steps:

Open Settings.

Click Bluetooth & Devices.

Click the Printers and scanners setting.

Next, click on the Add Device button.

Click on the Add manually option.

Select the Add a local printer or network printer with manual settings option.

Click the Next button.

Select the printer port using the “Use an existing port” drop-down menu.

Click the Next button.

Click the Windows Update button (if available).

Select the printer brand on the left side.

Select the printer model on the right side.

Click the Next button.

(Optional) Confirm a name for the printer.

Click the Next button.

Select the Do not share this printer option.

Click the Next button.

Click the Print Test Page button to confirm that the device is working.

Finally, click the Finish button.

After completing the steps, the old printer should be installed and ready to print in Windows 11.

When using automatic configuration, Windows 11 installs the basic printer driver. If you need to take advantage of advanced features (if any), you may need to add the printer using the manufacturer’s software.

Leave a Reply