
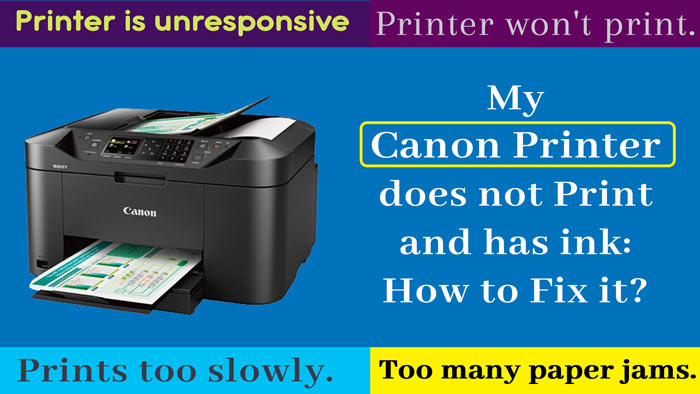
Canon Printer Does not Print
We do not know if it is one of Murphy’s laws but the truth is that it does not fail. You have to print some documents, you have just enough time and the printer doesn’t print. You make sure you’ve turned it on (no kidding, sometimes it happens), you know it’s got ink, and you start hitting all the buttons haphazardly.
Before you pick up the phone and take out your frustration on tech support or throw the printer out the window, know that there are some very simple things you can do to quickly and effectively fix the problem.
Before continuing reading this article, if your printer is from another brand, you may be interested in:
HP does not print and has ink. :-
Why doesn’t my Epson printer print?
My brother printer has stopped printing and has ink.
Reasons why your Canon printer does not print and has ink
There are several factors that can interfere with the proper functioning of your printer. A failure in the power cord, a software error, the ink cartridges are incorrectly inserted or they do not have a sufficient ink level and the printer has not warned you, the print heads are clogged… the reasons why your Canon printer does not print can be many. The good news? Most of the problems have easy solutions that you can implement yourself.
Solutions if your Canon printer has ink and does not print
The first thing we must do is diagnose the problem to know how to solve it. And since, surely, we will not know at first where the error is, the best way to discover it is to check and rule out.
Restart the printer
First of all, we are going to check that the power cable is correctly connected to the current and that the USB cable is well connected to the computer. If you print via Wi-Fi, check that it is activated.
It may seem obvious, but in many cases the failure is in the communication between the printer and the device where the document that we send to print is stored. Does the printer not print but does make copies? So you know where the problem is. Also check if you have documents in the print queue, delete them and restart the computer.
Does the printer still not print? Let’s restart it. With the printer on, press the cancel button for 20 seconds. Now disconnect the power cable and by pressing the power button and the cancel button simultaneously reconnect the cable. After a few seconds, release the buttons.
Check the ink level of the cartridges
If our printer stops printing, it is essential to check how much ink is left in the cartridges. As? Canon’s own page explains it. There is an ink tank indicator on the front of the machine. When the ink is near the lower limit line (B), it indicates that you are running out of ink. In Webcartucho you can buy ink cartridges for your Canon printer at the best price.
Reset ink cartridges
If the compatible cartridge has ink, is not damaged or defective, and is seated correctly, the problem may be because Canon does not recognize it. You can fix this by turning off the ink level alert. When the message appears, press the Stop/Reset button on your printer for about 15 seconds.
Check and clean the print heads
Clogged print heads is another reason why the printer may stop printing even though it has ink. To rule it out, we print a nozzle test pattern with which we will check if the ink comes out correctly. Follow these steps:
Make sure the power is on.
Load a single sheet of A4 or letter size plain paper into the input tray.
Pull out the paper output tray, and then open the output tray extension.
Press and hold the ‘Stop’ button until the ‘Alarm’ light flashes once, then immediately release.
The nozzle check pattern will now be printed. Do not carry out any other operation until the computer finishes printing it.
If the pattern is correct, the problem is not with the printheads. In the case of being incorrect, that is, if lines are missing or horizontal white stripes appear, we have to clean the print head. Follow these steps to do it:
Make sure the power is on.
Press and hold the ‘Stop’ button until the ‘Alarm’ light flashes twice, then immediately release.
The machine will start cleaning the print head.
Cleaning is complete when the ‘ON’ light becomes solid after blinking. Do not perform any other operations until the machine has finished cleaning the print head. This operation lasts 1 minute.
Now check the status of the print head by reprinting a test pattern. Cleaning unclogs the nozzles and returns the print head to normal, but keep in mind that this operation consumes a lot of ink. If with the first cleaning the problem does not disappear, we repeat the cleaning. If even so, after two cleanings, the test pattern is still incorrect, we will have to carry out a deep cleaning of the print head.
To perform this thorough head cleaning, follow these steps:
Make sure the power is on.
Press and hold the ‘Stop’ button until the ‘Alarm’ light flashes three times, then immediately release.
The machine will start the deep cleaning of the print head.
Cleaning is complete when the ON light turns solid after blinking. Do not carry out any other operations until the team has finished. This operation lasts approximately 3 minutes.
Now we check the print head condition again by printing a new test pattern.
You can also take a look at our post “How to clean the print heads of your printer”. Here we explain the process in much more detail.
Complete cleaning of the Canon printer
Does the problem persist after checking and ruling out all previous faults and after performing a deep head cleaning? Well, then we are going to carry out a complete cleaning of the system. It can be done in several ways. Aim.
How to perform a full system cleanup from a Windows computer:
Opens the printer driver setup window.
Click ‘System Cleaning’ on the ‘Maintenance’ tab. When the ‘System Cleaning’ dialog opens, select the ink group for which you want to perform system cleaning. Click ‘Initial Check Items’ to display the items that need to be checked before running System Clean, and always check the remaining ink level before running System Clean.
Run system cleanup. Make sure the printer is turned on first, then click ‘Execute’. Click ‘OK’ when the confirmation message appears and the system cleanup will start.
Finish system cleanup. After the confirmation message, the ‘Nozzle Check’ dialog box will open.
Check the results by printing a new test pattern.
How to perform a system clean from the printer control panel:
Press and hold the ‘Stop’ button until the ‘Alarm’ light flashes 5 times, then release the button.
