
Adding a printer or scanner to your Windows 10 computer can greatly enhance your productivity, whether you need to print documents for work, school, or personal use, or scan important papers and photos. This guide will walk you through the process step-by-step, ensuring you can easily set up and use your devices.
Introduction
Printers and scanners are essential peripherals for many users. Windows 10 makes it relatively straightforward to add and manage these devices. This article covers how to add a printer or scanner, troubleshoot common issues, and optimize their use.
1. Adding a Printer in Windows 10
1. Connecting the Printer
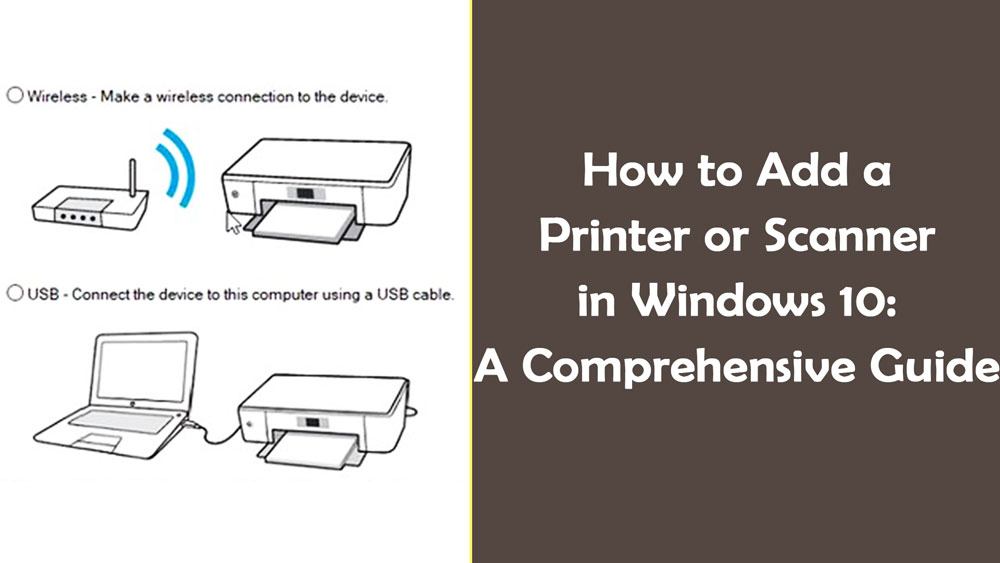
A. Wireless Printer
Power On the Printer:
Ensure your printer is turned on and connected to the same Wi-Fi network as your computer.
Enable Wi-Fi on Printer:
Use the printer’s control panel to enable Wi-Fi. Follow the manufacturer’s instructions to connect it to your Wi-Fi network.
B. Wired Printer
Connect via USB:
Plug the printer into your computer using a USB cable. Windows 10 should automatically detect the printer and begin the setup process.
2. Adding the Printer via Windows Settings
Open Settings:
Click on the Start menu and select the “Settings” gear icon or press Win + I.
Navigate to Devices:
In the Settings window, click on “Devices”.
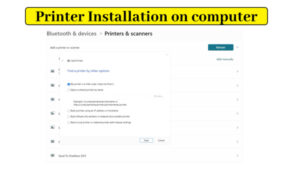
Add a Printer:
Click on “Printers & scanners” in the sidebar. Then, click “Add a printer or scanner”.
Detecting the Printer:
Windows will search for available printers. Once your printer appears in the list, click on it and then click “Add device”.
Follow Installation Prompts:
Follow any additional on-screen instructions to complete the installation. Windows might download and install necessary drivers.
3. Using Manufacturer’s Software
Some printers require specific software provided by the manufacturer for full functionality. You can usually find this software on the manufacturer’s website.
Download the Software:
Visit the manufacturer’s website and download the latest software/drivers for your printer model.
Install the Software:
Run the downloaded file and follow the installation prompts. This might include additional setup steps specific to your printer.

1. Connecting the Scanner
A. Wireless Scanner
Power On the Scanner:
Ensure your scanner is turned on and connected to the same Wi-Fi network as your computer.
Enable Wi-Fi on Scanner:
Use the scanner’s control panel to connect it to your Wi-Fi network, following the manufacturer’s instructions.
B. Wired Scanner
Connect via USB:
Plug the scanner into your computer using a USB cable. Windows 10 should automatically detect the scanner and begin the setup process.
2. Adding the Scanner via Windows Settings
Open Settings:
Click on the Start menu and select the “Settings” gear icon or press Win + I.
Navigate to Devices:
In the Settings window, click on “Devices”.
Add a Scanner:
Click on “Printers & scanners” in the sidebar. Then, click “Add a printer or scanner”.
Detecting the Scanner:
Windows will search for available scanners. Once your scanner appears in the list, click on it and then click “Add device”.
Follow Installation Prompts:
Follow any additional on-screen instructions to complete the installation. Windows might download and install necessary drivers.
3. Using Manufacturer's Software
Like printers, some scanners require specific software for full functionality.
Download the Software:
Visit the manufacturer’s website and download the latest software/drivers for your scanner model.
Install the Software:
Run the downloaded file and follow the installation prompts. This might include additional setup steps specific to your scanner.
Troubleshooting Common Issues
1. Printer or Scanner Not Detected
Check Connections:
Ensure the printer or scanner is properly connected to the network or via USB.
Restart Devices:
Restart your computer and the printer/scanner.
Update Drivers:
Visit the manufacturer’s website to download the latest drivers.
Use Windows Troubleshooter:
Go to “Settings” > “Update & Security” > “Troubleshoot” > “Additional troubleshooters”. Select “Printer” or “Scanner” and follow the prompts.
2. Printer or Scanner Offline
Check Power and Connectivity:
Ensure the device is powered on and connected to the network.
Set as Default:
In “Printers & scanners” settings, click on your printer/scanner and select “Manage”. Then, click “Set as default”.
Restart Print Spooler:
Open “Services” by typing it in the search bar. Find “Print Spooler”, right-click, and select “Restart”.
3. Poor Print or Scan Quality
Check Ink/Toner Levels:
Ensure your printer has enough ink or toner.
Clean the Device:
Use the manufacturer’s cleaning instructions to clean the print heads or scanner glass.
Adjust Settings:
Check the print/scan settings in the software to ensure they are optimized for your needs.
Optimizing Printer and Scanner Use
1. Regular Maintenance
Update Firmware:
Keep your printer/scanner’s firmware up to date.
Clean Regularly:
Clean the printer’s rollers and scanner glass to prevent smudges and lines.
2. Use High-Quality Supplies
Ink and Paper:
Use high-quality ink/toner and paper for better print results.
3. Optimize Settings
Print Settings:
Adjust print settings (resolution, paper type) in the printer software to match your task.
Scan Settings:
Choose appropriate scan resolutions and formats for the best results.
4. Utilize Advanced Features
Wireless Printing:
Use wireless printing features to print from multiple devices.
Cloud Scanning:
Some scanners offer cloud scanning options to save documents directly to cloud storage services.
Conclusion
Adding and managing a printer or scanner in Windows 10
is straightforward, especially with the detailed steps provided in this guide.
Regular maintenance, updating drivers, and using high-quality supplies can
ensure your devices function optimally. Whether for personal or professional
use, understanding how to properly set up and troubleshoot these devices can
save time and enhance productivity.

